Dynamically change the mesh component of niagara effect
When creating an Niagara effect in Unreal you can spawn the particles around a mesh component. This is awesome if you have an effect that should cover a full object, like flames or smoke.
In our game Kabonk! we needed a similar effect for around our paddle. The thing was. Our paddle could change shape and thus we needed to update the Niagara effect accordingly. Here is how to use the the Blueprint node “Set Niagara Static Mesh Component”.
First of all. Create a Niagara Effect with a Static Mesh Location node in the Particle Spawn.
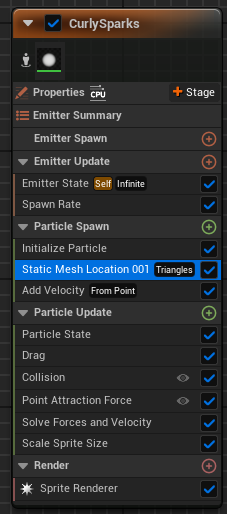
Click the node and on the right side under “Static Mesh” click the dropdown and select “Read from new User parameter”.

Give it a name, e.g. “MyCustomMesh”. This name will be used later.
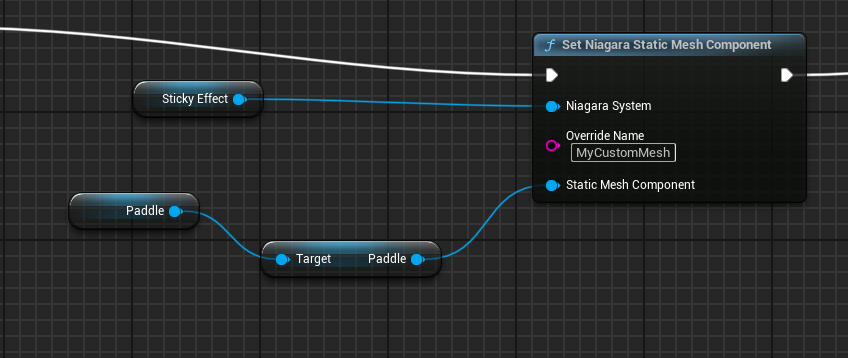
Next, in Blueprint you can use the Set Niagara Static Mesh Component. The parameters should be filled: Niagara System: The Niagara component Override Name: Your User Paramter (in our example “MyCustomMesh”) Static Mesh Component: The Mesh Component. In this example I have and actor “Paddle” that has a “Paddle” as component name (I know).
It should look somewhat like this:
If it doesn’t work, try the following:
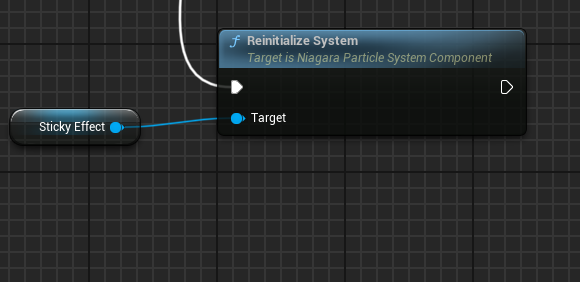
Add a Reinitialize System node after changing the mesh.
And make sure that the meshes you use have CPU Access enabled (open Mesh, check Allow CPUAccess).

Final result: